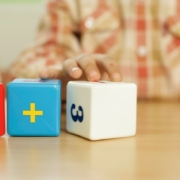
Subtraction – One Digit Lesson Plan for Teachers

Lesson Title:Subtraction – One Digit

Lesson Objective: Students will be able to solve one-digit subtraction problems and understand the concept of borrowing when subtracting.

Materials: Whiteboard, dry-erase markers, number cards (0-9), subtraction worksheets, manipulatives (e.g. base ten blocks, counters)

Introduction (5 minutes): Begin the lesson by asking students if they know what subtraction is. Allow students to share their understanding of subtraction. Write a few examples of simple subtraction problems on the whiteboard (e.g. 5 – 3 = 2, 8 – 4 = 4)

Direct Instruction (10 minutes): Explain to students that subtraction is when we take away one number from another number to find the difference. Write the problem 8 – 3 = ? on the whiteboard and have students suggest ways to solve it. Model different methods for solving the problem using number cards or manipulatives such as base ten blocks or counters. Introduce the concept of borrowing when one of the digits in the problem equals or is less than 0. Write the problem 9 – 5 = ? on the whiteboard and demonstrate how to borrow and find the correct answer.

Guided Practice (15 minutes): Divide students into small groups. Give each group a set of number cards and have them work together to solve simple subtraction problems. Monitor the groups and provide feedback as needed. Provide assistance with borrowing when necessary.

Independent Practice (20 minutes): Hand out a subtraction worksheet to each student with one-digit subtraction problems. Ask students to solve the problems on their own. Provide additional support to students who need it. Collect the worksheets and provide feedback to students.

Closure (5 minutes): As a class, review the concept of borrowing when subtracting. Ask students to share any strategies they used to solve the subtraction problems. Remind students that practice is important for understanding and solving subtraction problems.

Assessment: Observe the students during the independent practice to assess their understanding of solving one-digit subtraction problems and borrowing. Collect and review the worksheets to assess students’ ability to solve one-digit subtraction problems and understand the concept of borrowing.

Note: The above is just a general guide, adjust duration and activities according to the class size and student’s level of understanding.

Introduction to Mixed Operations for First Graders Printable Lesson Plan

Lesson Title:Introduction to Mixed Operations for First Graders

Lesson Objective: Students will understand the concept of mixed operations and be able to solve mixed operation problems using manipulatives.

Materials:

  • Number cards (1-10)
  • Counters (such as small bears or blocks)
  • Mixed operation worksheets
  • Chart paper
  • Markers
  • Introduction (5 minutes):

    1. Begin the lesson by reviewing the concepts of addition and subtraction.
    2. Use counters to demonstrate simple addition and subtraction problems and ask the students to solve them.
    3. Introduce the idea of mixed operations, which are problems that include both addition and subtraction.

    Direct Instruction (15 minutes):

    1. Pass out the number cards (1-10) to each student.
    2. Have the students work with partners and use the counters to create mixed operation equations using the number cards.
    3. Call on a few students to share their mixed operation equations and have the class solve them together using the counters.
    4. Write the mixed operation equations on the chart paper and have the students help solve them.

    Guided Practice (20 minutes):

    1. Pass out the mixed operation worksheets to each student.
    2. Have the students work with their partners to complete the mixed operation problems on the worksheets using counters to visualize the problem.
    3. Circulate around the room to assist and check for understanding.

    Independent Practice (10 minutes):

    1. Have the students complete a few problems on the worksheet independently.
    2. Provide extra support and assistance as needed.

    Closure (5 minutes):

    1. Review the concept of mixed operations with the students.
    2. Have a few students share one of the mixed operation problems they solved during the lesson.
    3. Remind the students that mixed operations are an important math skill and will be used in many areas of their lives.

    Assessment: Observe students during independent practice, check the mixed operation worksheets and informally assess students’ understanding of the mixed operation concept using verbal questions.

    Lesson Plan on Adding Two-Digit Numbers

    Lesson Title:Adding Two-Digit Numbers

    Lesson Objective: Students will be able to add two-digit numbers with regrouping/carrying.

    Materials:

  • Whiteboard and markers
  • Basic addition worksheets
  • Base 10 blocks
  • Introduction (5 minutes): Begin the lesson by reviewing basic addition concepts with one-digit numbers. Write simple addition problems on the whiteboard and have students solve them as a class.

    Direct Instruction (10 minutes): Introduce the concept of regrouping or carrying when adding two-digit numbers. Show an example of adding 35 + 24 using base 10 blocks. Explain that when we add the ones place (5 + 4), we get 9, which is greater than 10, so we need to regroup or carry a 1 to the tens place. Show another example of adding 45 + 27 and have students work through it with you.

    Guided Practice (20 minutes): Provide students with basic addition worksheets that include two-digit numbers. Walk around the room and assist students as they work through the problems. Help them to understand the concept of regrouping and carrying.

    Independent Practice (20 minutes): Have students work independently on additional two-digit addition problems. Monitor their progress and assist as needed.

    Closure (5 minutes): Review the concept of regrouping and carrying with the class. Ask students to provide examples of two-digit addition problems that they solved during independent practice.

    Assessment: Observe students as they work through the problems, provide feedback on their progress, and evaluate their understanding of the concept.

    Note:

  • You can also use some online interactive activities, games, and videos to supplement the lesson and make it more engaging.
  • You can adjust the time duration based on your student’s needs and class duration.
  • Depending on your school’s curriculum, you might need to adjust the objectives and materials accordingly.
  • Introduction to Fractions lesson plan

    Lesson Title:Introduction to Fractions

    Lesson Objective: Students will be able to understand the concept of fractions and represent them using concrete materials.

    Materials:

  • A set of linking cubes or other manipulatives (such as blocks or counters)
  • Fraction circles or other visual models (such as number lines or rectangles)
  • Fraction worksheets (with problems that involve fractions)
  • Introduction (5 minutes):

  • Begin by reviewing the concepts of equal parts and whole with the students. Use concrete examples (such as cutting an apple into equal parts) to demonstrate these concepts.
  • Introduce the concept of fractions and explain that it is a way to represent equal parts of a whole. Use concrete materials (such as linking cubes) to demonstrate this concept.
  • Activity 1 (10 minutes):

  • Divide students into small groups and give each group a set of linking cubes and fraction circles.
  • Explain that the fraction circles can be used to help them represent fractions.
  • Model representing a simple fraction (such as 1/2) using the linking cubes and fraction circles. Show the students how to divide the whole into equal parts and then count the number of parts to find the fraction.
  • Allow students to work with their partners to represent different fractions using the linking cubes and fraction circles.
  • Activity 2 (10 minutes):

  • Provide students with a set of fraction worksheets.
  • Explain that the worksheets contain problems that involve fractions and that the students need to use the strategies learned in the previous activity to solve the problems.
  • Allow students to work independently or with a partner to complete the worksheets.
  • As students work, circulate around the room and provide support and guidance as needed.
  • Activity 3 (10 minutes):

  • Gather the students together and have them share the fractions they represented and the strategies they used.
  • Allow students to explain their thinking and reasoning.
  • Provide feedback and praise for their efforts and progress.
  • Conclusion (5 minutes):

  • Review the concepts of fractions and the strategies used to represent them.
  • Encourage students to continue practicing representing fractions using concrete materials and visual models.
  • Lesson Plan on Introduction to Equal Parts

    Lesson Title:Introduction to Equal Parts

    Lesson Objective: Students will be able to understand the concept of equal parts and represent them using concrete materials and visual models.

    Materials:

  • A set of linking cubes or other manipulatives (such as blocks or counters)
  • Fraction circles or other visual models (such as number lines or rectangles)
  • Equal parts worksheets (with problems that involve equal parts)
  • Introduction (5 minutes):

  • Begin by reviewing the concept of whole with the students. Use concrete examples (such as a whole pizza or a whole apple) to demonstrate this concept.
  • Introduce the concept of equal parts and explain that it is dividing a whole into equal portions. Use concrete materials (such as linking cubes) to demonstrate this concept.
  • Activity 1 (10 minutes):

  • Divide students into small groups and give each group a set of linking cubes and fraction circles.
  • Explain that the fraction circles can be used to help them represent equal parts.
  • Model dividing a whole into equal parts (such as 2 equal parts) using the linking cubes and fraction circles. Show the students how to count the number of parts to find the number of equal parts.
  • Allow students to work with their partners to divide different wholes into equal parts using the linking cubes and fraction circles.
  • Activity 2 (10 minutes):

  • Provide students with a set of equal parts worksheets.
  • Explain that the worksheets contain problems that involve equal parts and that the students need to use the strategies learned in the previous activity to solve the problems.
  • Allow students to work independently or with a partner to complete the worksheets.
  • As students work, circulate around the room and provide support and guidance as needed.
  • Activity 3 (10 minutes):

  • Gather the students together and have them share the equal parts they represented and the strategies they used.
  • Allow students to explain their thinking and reasoning.
  • Provide feedback and praise for their efforts and progress.
  • Conclusion (5 minutes):

  • Review the concepts of equal parts and the strategies used to represent them.
  • Encourage students to continue practicing representing equal parts using concrete materials and visual models.
  • Remind students that with practice and perseverance, they will become experts in understanding equal parts!
  • Assessment:

  • Observe students as they work on the activities and listen to their explanations of the equal
  • Introduction to Identifying Halves, Thirds, and Fourths Printable Lesson Plan

    Lesson Title:Introduction to Identifying Halves, Thirds, and Fourths

    Lesson Objective: Students will be able to understand and identify halves, thirds, and fourths of a whole using concrete materials and visual models.

    Materials:

  • A set of linking cubes or other manipulatives (such as blocks or counters)
  • Fraction circles or other visual models (such as number lines or rectangles)
  • Fraction identification worksheets (with pictures of halves, thirds, and fourths)
  • Introduction (5 minutes):

  • Begin by reviewing the concepts of equal parts and whole with the students. Use concrete examples (such as cutting an apple into equal parts) to demonstrate these concepts.
  • Introduce the concept of halves, thirds, and fourths and explain that they are specific types of equal parts. Use concrete materials (such as linking cubes) to demonstrate this concept.
  • Activity 1 (10 minutes):

  • Divide students into small groups and give each group a set of linking cubes and fraction circles.
  • Explain that the fraction circles can be used to help them identify halves, thirds, and fourths.
  • Model identifying a simple fraction (such as 1/2) using the linking cubes and fraction circles. Show the students how to divide the whole into equal parts and then count the number of parts to find the fraction.
  • Allow students to work with their partners to identify different fractions using the linking cubes and fraction circles.
  • Activity 2 (10 minutes):

  • Provide students with a set of fraction identification worksheets.
  • Explain that the worksheets contain pictures of halves, thirds, and fourths and that the students need to use the strategies learned in the previous activity to identify the fractions.
  • Allow students to work independently or with a partner to complete the worksheets.
  • As students work, circulate around the room and provide support and guidance as needed.
  • Activity 3 (10 minutes):

  • Gather the students together and have them share the fractions they identified and the strategies they used.
  • Allow students to explain their thinking and reasoning.
  • Provide feedback and praise for their efforts and progress.
  • Conclusion (5 minutes):

  • Review the concepts of halves, thirds, and fourths and the strategies used to identify them.
  • Encourage students to continue practicing identifying fractions using concrete materials and visual models.
  • Curriculum development and implementation

    Understanding Time for Kindergarten Children Lesson Plan

    Lesson Title:Understanding Time for Kindergarten Children

    Lesson Objective: Students will be able to identify and read a clock to the hour and half hour, and understand the concept of time as it relates to daily routines and activities.

    Materials:

  • Clock with movable hands
  • Time worksheets
  • Clock flashcards
  • Chart paper and markers
  • Introduction: Begin the lesson by asking the students to name different times of the day, such as morning, afternoon, and evening. Write their responses on chart paper. Then, introduce the concept of a clock and how it helps us keep track of time. Show the students the clock and demonstrate how the hands move to indicate the time.

    Activity 1: Clock Flashcards. Distribute the clock flashcards to the students and have them work in pairs to match the time on the card to the matching clock face. As they complete the activity, walk around the room and provide feedback and encouragement.

    Activity 2: Time Worksheets. Provide the students with worksheets that have pictures of different activities and the corresponding time. Have the students match the activity to the correct time on the clock. For example, “eating breakfast” would match with “7:00 AM.”

    Activity 3: Creating a daily schedule. Divide the students into small groups and provide them with chart paper and markers. Have the students brainstorm and create a schedule of their daily activities and the corresponding times. For example, “Wake up at 7:00 AM, eat breakfast at 7:30 AM, go to school at 8:00 AM” etc.

    Closure: Review the concepts learned during the lesson by asking the students to tell the time on the clock. Have them also share one thing they learned about time today. Lastly, remind students that time is an important aspect of our lives and we should use it wisely.

    Assessment: Observe students during the different activities and note their understanding of the concept of time. Collect the daily schedule chart papers and review them for accuracy and understanding.

    Note: This is a basic lesson plan for understanding time for Kindergarten children. You should adjust the activities and materials according to your student’s learning style and abilities.

    Additionally, you could include some games and songs that could help the kids to remember the time better and also learn in a fun way.

    Numbers and Counting up to 10 lesson plan for teachers

    Lesson Title: “Numbers and Counting up to 10”

    Lesson Objective: Students will be able to count from 1 to 10, write the numerals for each number, and understand the concept of quantity.

    Materials: Number cards (1-10), whiteboard, markers, worksheets

    Introduction (5 minutes):

  • Begin the lesson by reviewing the numbers that the students have already learned. Ask the students to count from 1 to 5 and then from 6 to 10.
  • Introduce the new numbers and numerals that the students will be learning during the lesson.
  • Direct Instruction (15 minutes):

  • Show the students the number cards (1-10) and have them place them in numerical order on the whiteboard.
  • Call on individual students to come up to the whiteboard and write the numeral that corresponds to each number card, while the rest of the class says the number out loud.
  • Review the numerals and numbers with the class, and have the students practice writing them on their own.
  • Guided Practice (15 minutes):

  • Distribute the worksheets to the students and have them complete the exercises, which include matching numbers with numerals, counting objects, and writing numbers in order.
  • Circulate the room to provide assistance as needed.
  • Once the students have completed the worksheets, go over the answers as a class, and have the students self-correct any mistakes.
  • Independent Practice (15 minutes):

  • Have the students work in small groups to count objects in the room (e.g. desks, chairs, students) and write the number on the board.
  • As the students work, circulate the room to provide assistance and to check for understanding.
  • Once the students have finished counting, have them share their results with the class and discuss any discrepancies.
  • Closure (5 minutes):

  • Review the numbers and numerals that the students have learned during the lesson.
  • Assign homework that includes counting and writing numbers up to 10.
  • Assessment:

  • Observe the students during the independent practice to assess their understanding of counting and writing numbers up to 10.
  • Review the completed worksheets and corrected answers to assess their understanding of matching numbers with numerals and counting objects.
  • Collect homework and assess the students’ ability to count and write numbers up to 10 independently.
  • Note:

  • For differentiation, you can use manipulatives like blocks or counting bears to support visual learners.
  • For extension, you can introduce the concept of ordinal numbers (1st, 2nd, 3rd etc) and use them in context.
  • Remind the students to practice counting and writing numbers regularly to solidify their understanding.
  • Lesson Plan on Counting and Number Patterns in First Grade Math

    Lesson Title:Counting and Number Patterns in First Grade Math

    Lesson Objective: Students will be able to count to 100 by ones and tens, identify and extend number patterns, and use addition and subtraction within 20.

    Materials: Number cards (1-100), counting bears, whiteboard, dry erase markers, addition and subtraction worksheets

    Introduction (10 minutes): Begin the lesson by reviewing basic counting skills with the students. Have them count to 20 together as a class and then have them count in groups of 2s, 5s, and 10s. Use the number cards and counting bears to help with this activity.

    Direct Instruction (15 minutes): Introduce the concept of number patterns to the students. Write a simple number pattern on the whiteboard (such as 2, 4, 6, 8) and ask the students to identify the pattern. Then, ask them to extend the pattern (10, 12, 14, 16). Repeat this activity with different patterns and have the students come up to the board to write the next number in the pattern.

    Guided Practice (20 minutes): Provide the students with worksheets that have simple number patterns and ask them to complete the patterns. Assign partners for this activity and have them check each other’s work. Use dry erase markers for them to write their answers.

    Independent Practice (20 minutes): Give the students addition and subtraction worksheets that are within 20. These worksheets will have problems like 3+4= and 7-2=. Allow them to work independently and check their work with a partner before turning in their worksheets.

    Closure (5 minutes): As a class, review the key concepts of counting to 100 by ones and tens, identifying and extending number patterns, and using addition and subtraction within 20. Ask the students to give examples of each concept and have them share their answers with the class.

    Assessment: The students will be assessed through their participation in class discussions, completion of worksheets and accuracy of answers.

    Note: It’s important to adjust the time and activities according to the student’s abilities, but this plan can be a good starting point. Also, it’s important to involve the students in the activities and have them participate as much as possible. Make sure to provide positive feedback for their efforts and correct answers.

    classroom management

    Lesson Plan on Numbers and Counting up to 20

    Lesson Title: “Numbers and Counting up to 20”

    Lesson Objective: Students will be able to count from 1 to 20, write the numerals for each number, and understand the concept of quantity.

    Materials: Number cards (1-20), whiteboard, markers, worksheets

    Introduction (5 minutes):

  • Begin the lesson by reviewing the numbers that the students have already learned up to 10. Ask the students to count from 1 to 10 and then from 11 to 20.
  • Introduce the new numbers and numerals that the students will be learning during the lesson.
  • Direct Instruction (15 minutes):

  • Show the students the number cards (1-20) and have them place them in numerical order on the whiteboard.
  • Call on individual students to come up to the whiteboard and write the numeral that corresponds to each number card, while the rest of the class says the number out loud.
  • Review the numerals and numbers with the class, and have the students practice writing them on their own.
  • Guided Practice (15 minutes):

  • Distribute the worksheets to the students and have them complete the exercises, which include matching numbers with numerals, counting objects, and writing numbers in order.
  • Circulate the room to provide assistance as needed.
  • Once the students have completed the worksheets, go over the answers as a class, and have the students self-correct any mistakes.
  • Independent Practice (15 minutes):

  • Have the students work in small groups to count objects in the room (e.g. desks, chairs, students) and write the number on the board.
  • As the students work, circulate the room to provide assistance and to check for understanding.
  • Once the students have finished counting, have them share their results with the class and discuss any discrepancies.
  • Closure (5 minutes):

  • Review the numbers and numerals that the students have learned during the lesson.
  • Assign homework that includes counting and writing numbers up to 20.
  • Assessment:

  • Observe the students during the independent practice to assess their understanding of counting and writing numbers up to 20.
  • Review the completed worksheets and corrected answers to assess their understanding of matching numbers with numerals and counting objects.
  • Collect homework and assess the students’ ability to count and write numbers up to 20 independently.
  • Note:

  • For differentiation, you can use manipulatives like blocks or counting bears to support visual learners.
  • For extension, you can introduce the concept of ordinal numbers (1st, 2nd, 3rd etc) and use them in context.
  • Remind the students to practice counting and writing numbers regularly to solidify their understanding. -You can also use games such as counting bingo, memory match, or flash cards to make counting more engaging.
  • Encourage students to practice counting by tens, e.g. 10, 20, 30, etc. to help them understand the pattern in numbers and make counting easier.